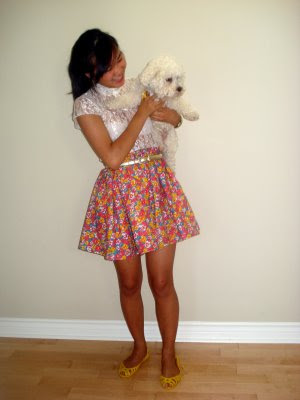


Puffy Skirt Tutorial:
I love these skirts. They are awesomely fun to wear and really versatile. It's really easy to make, especially once you get your first one done. I highly recommend that if you have some fabric, elastic and an hour or two of time, definitely give this a try!
NOTE: You can really change the pattern however you like. I just made this up to suit my preferences, but there is no correct way! Also, I'm not using any technical sewing terms (mainly as I don't know any) so, yeah. Sorry. (But then again, that's what always gets me confused in patterns.. so, maybe my lack of sewing-vocabulary is better?)
NOTE 2: Pretend the piece of paper is fabric - it's mainly to show you where to cut/ sew.
What you need:
- 0.5 yard - 1.5 yards of fabric
- 0.75 inch - 1 inch elastic
- Sewing basics (machine, thread, scissors, pins, etc.)
1. Purchase your material.
Any fabric that is not too thick is suitable for this project. I usually use this cheap cotton that ends up being a few dollars for 1.5 yards. Depending on how puffy you intend your skirt on being, purchase 0.5 to 1.5 yards of fabric. (the more, the pouffier. I usually use 1.5 yards for a very pouffy affect)
2. Cut the fabric in two pieces, lengthwise. I usually to cut on the folded line of the fabric.


3. Make an elastic holder. (Do this to both pieces of fabric)
Pin the top of the fabric down about 0.5 inch. Press (iron).


Remove pins and fabric should remain folded. Pin this fabric down again, about a half inch bigger than your elastic. Ex. the elastic I'm using is 0.75 inch, so I pinned the fabric down 1.25 inch. Press.


Sew along the seam, so the folded fabric remains folded down.


4. Sew fabrics together. Pin the right sides of the fabric (i.e. side that you want showing) together. Sew along the seams, up until the elastic holder.


5. Put in elastic.
Measure the length of the elastic by placing it around your waste. It should be comfortable, but fit snuggly. (Overlap the ends of the elastic.)

Place a safety pin at the end of your elastic and thread it through, bunching the pieces of fabric as you go. Ensure that you pin the other end of the elastic at the end of the skirt's opening (so you do not lose it).


Sew the ends of the elastic together. To ensure stability, you may want to cross stitch it several times.

6. Close the ends of the skirt. Distribute the elastic evenly between the two pieces of fabric (so there is equal bunching all around). Once content, sew the open ends of the skirt (the elastic holder) together. The thread will not show because of the bunching.

7. Hem the skirt. (NOTE: you can hem the skirt however you please - I know that there are many methods. Do as you prefer! I think that this is the easiest one to explain and do.)
Pin the hem (bottom) of the skirt 0.5 inch. Press and remove pins.

Put the skirt on and pin it up at the length that you would like it to be.

Remove the skirt and pin it up at the length that you had pinned. Ensure that the 0.5 inch remains folded (for clean lines). Press.


Sew along the hem.

8. Voila!

Enjoy your brand-new skirt! :) You can embellish it however you like, or keep it as it is. It looks really cute sinched at the waist with a belt, but maybe you'll find new ways to wear it!
If you have any questions, definitely go ahead and comment and I'll happily clarify any of the instructions. If you do make this (um, I love you!) then please post a picture - I'd love to see the finished result. I personally feel that everyone should enjoy this wonderful experience and should therefore make one.

Have a good day!


