5.7.10

cha cha real smooth... and REMIXXXXXXX.

Guys. I feel bad. I'm doing something extremely illegal. I've been told to never do it. Yet I am. Sigh. Here it goes... I'm plagiarizing.

FROM MYSELF THAT IS!

Oh snap snap snap. (Can I please get a bro-slap? Someone? PLEASE?! I'm da MAN. (Bro-slap? Man? Get it? Yeah...)) Anyways... HAH, fooled ya! You thought I REALLY plagiarized. Oh, you. So much to learn! Er. And again, anyways... Awhile back I received this email regarding an awesome Chictopia Contest and two things ran through my mind: 1) WOW THAT'S FREAKING AWESOME and 2) uh oh, my Chictopia is dead. Being proactive and all, I IMMEDIATELY got onto to both and I am now happy to announce that 1) I decided to enter the contest even though it's one of those oh-I'll-never-win things but whatevz cuz it's actually "freaking awesome" (ew, who says that? SO unintellectual, pffft) (i'm quoting myself. see the irony? Hah. I'm ironic and witty like that.) and 2) I semi-revised my chictopia. Holllaa!

Basically, you had to remix one item into three looks. Thought I'd share it on the blog because here's a fun fact: whenever I see those pages in magazines I ALWAYS ALWAYS ALWAYS style the item in my head in my own ways. (NYLON got this feature in their magazine a few issues ago and I literally whooped. (not literally) It's so much fun. I'm a complete dork. Yay!)


^ To break all the text, I decided to post some of my hottest piczzz. just for funz. cuz y'all should know, i'mma single and ready to mingle! any takers? ;) ;)

-------------------------------------------------------------------------------------

ENTRY:

Warning: I decided it would be fun to write a, you know, novel in this spot… Pfft, yeah I’m cool.

REMIX. That is DEFINITELY one of the BEST WORDS EVER. Maybe it’s just me, but there’s so much about that word that makes me ecstatic! I mean, upon hearing the word, I have all of these fantastic visions: 1) an incredibly rad 90s mix tape (strictly tape, not CDs. And strictly 90s, not today.) 2) A day of mixing and matching wardrobe pieces to create fabulous looks. And, while both are pretty amazing visions to be associated with the word remix, today I’m going to share the latter – the amazing outfits that come about when “remixing” a wardrobe!

The item that I’ve chosen to remix is my fantastic long, vintage floral skirt that I got for the mere price of $5. With an elastic waistband, this is perhaps THE most versatile piece in my closet. (I actually completely dorked out and found a matching blue one. So I bought it. Come on, you’ll see why it’s cool!) This is as, with proper styling, accessories and creativity, it not only changes to fit a style, event, or mood, but it changes its SHAPE all together, allowing it to easily transcend throughout just one week!

I know that there’s some fashion rule or another about how YOU MUST NOT WEAR THE SAME THING IN A WEEK. But, hey, as I always say: these silly rules are MEANT to be broken (ready to be a rebel?). And, with the versatility of the skirt, it could easily be worn throughout the week without a hitch. Don’t worry, I’ll walk you through your schedule…

(Disclaimer: cheesy alliterations CAN be altered.)

OUTFIT 1: WORKING WEDNESDAYS
Image and video hosting by TinyPic
(Skirt – Vintage, Vest – Peru, Tights – H&M, Shoes – John Fleuvog, Blouse – Winners, Accessories – Assorted)
Sure, you survived Monday and Tuesday. But those were LONG days and, somehow, you’re still only half way through the week! In the mood to mope around? NO. Induce some much-needed fun into the week by sprucing up that work wardrobe. Keep your work attire appropriate with black accessories and wearing your favourite long skirt as it is: a long skirt. But, inject that energy and excitement that you oh so long for with a fun vest, bright tights, layers of jewelry and belts, and a bright shirt. And, hey, since you look SO fantastic, maybe you’ll break out of your midweek moodiness and treat yourself for a dinner or a show. It may be the middle of the week and it may be a long skirt, but it’s anything but dowdy!

OUTFIT 2: FUN FRIDAY
Image and video hosting by TinyPic
(Skirt worn as a top – Vintage, Black Skirt – Homemade, Tights – H&M, Shoes – Nine West, Purse – Thrifted, Accessories – Assorted)
And it worked (ha-ha, pun? aw yeah.)! The week has passed by – hopefully in style – and it’s time to toast to the weekend. Whether you’re out partying with friends or hanging out at home (hey, either works!), it’s a guarantee that you’ll have lots of fun in this ensemble. (Maybe I’m a total dork, but putting it together is plenty of fun in itself! …Okay, yes, I’m a total dork. But still…) Roll the waistband of the skirt a few times and hoist it up – put one side over your shoulder and one under your armpit. You can safety pin it into place or, even better, secure it with a big, bold, and bright belt! Now, with this new, chic, one-shoulder dress, all you have to do is accessorize! Maybe bright tights, a full skirt, clonkin’ heels, and a hairpiece will do the trick. Whatever the case, remember: it’s fashion and it’s Friday – the two put together only means one thing… HAVE FUN.

OUTFIT 3: SIMPLE SUNDAYS
Image and video hosting by TinyPic
(Skirt worn as a dress – Vintage, Denim Jacket – Thrifted, Shoes – Thrifted Keds, Bag – Thrifted, Hat – F21, Accessories – Assorted)
Somehow this once so long and boring week has WHIZZED by! (Should we thank that long skirt?) While Sundays are reserved as the “lazy day” (amen!), you don’t need to spend the day in lazy sweats. Wear that long skirt as a simple strapless dress: hoist the waistline under your armpits and secure it in place with a belt under your bust. Throw on some of your favourite worn-in accessories (hello oversized denim jacket and old Keds!) to keep comfortable. And, while you’re throwing on accessories, you might as well rock some fun pieces to continue looking chic… perhaps a bright red sun hat and purple socks! Looking good can compensate for a lazy day of lounging in the house. :)

Final Tips
- Wear clothes how you WANT to wear them, not how you THINK you should wear them
- Channel your inner child and play dress up. The possibilities are ENDLESS when you keep an open mind and have fun!
- Accessories can make an outfit, so use them to your advantage! If you’re feeling for something fun, wear wedges. But if you’re in the mood for a relaxed look, break out those mom sneakers.
- Use your accessories to not only change the mood and style of the garment, but also the actual SHAPE of the garment. Manipulating the shape – maybe a skirt to a dress – is a guarantee that you won’t be looking like a fashion victim!
- Finally, like anything in fashion, make sure you have FUN! With confidence and energy, you can pull of any look.

I had so much fun (fo realzzz!) creating these looks and I hope you enjoyed viewing them! In the words of ART ATTACK, “Try it yourself!”

:)

-------------------------------------------------------------------------------------

IF YOU HAVE CHICTOPIA FIND ME AND FRIEND ME! And maybe give me some chic points?! :) Because these will increase myself esteem. Not that I need to. I'm SO good lookin'. (Refer to picture to come.)

Phew! (Bravo if you read all/any of it!) Apparently I REALLY had nothing to do whilst writing all this! Which is surprising. I mean, how could I NOT have a ton of friends and be busy all the time? That's what I wanna know! For more info, search me up on match.com or lavalife. ;)

vertual frendz i luvz u so muchzz. xoxooxox.

P.S. By popular request (seriously makes me feel super cool to say that. regardless of whether or not it's true so DON'T BURST MY BUBBLE!) ROSETTE TUTORIAL is up!

P.P.S. I've gotten a few comments regarding starting up an etsy store/ selling the things I make and BE HONEST (but not TOO honest. I may be one of ur supa attractivz vertual frend but I HAVE FEELINGS TOO), WOULD YOU BUY SOMETHING?! And, if so, what would you want me to sell? Have a peruse here and here (not sure if there's any difference between my tags for "diy" and "sewing" but, um... it'll be a SURPRISE! Yay! Now you MUST peruse!). So LET ME KNOW. fo realz.

:)

4.7.10

celebratin' da big 100 post with a... ROSETTE TUTORIAL.

Aw yeah. Who's getting excited?! WHO'S GETTING EXCITED?! YOU'RE getting excited! (I feel so camp counselor-esque... Treating you guys like little campers is how I will fulfill the summer camp CIT experience I never had. Boo yeah?!) Anyways, as the title says, it's ROSETTE TIME.

Just some background information on rosettes... I HAVE MADE WAY TOO MANY ROSETTES TO COUNT. To put it eloquently. At least a hundred. You see, I sold them for the Green Fashion Show that I organized and they were a surprisingly huge hit so I made TONS. And, somehow, I still haven't gotten sick of them and made EVEN MORE. Which is a real testament to how awesome they are and how YOU SHOULD DO IT. (Guys, I'd be an awesome camp counselor! Look at that ENTHUSIASM. Can you give a Y? An A? Another Y? YAY!)


(selection of rosette hairclips that were sold)

So, at last, I will now be a good citizen and share my knowledge with the people because my soul is just beautiful and my wisdom must be spread to the kids of the future, the kids of tomorrow and I will now stop talking and move onto the tutorial so YAY.

ROSETTE TUTORIAL

Approximate Time: 10 minutes
Level: Easy (peasy pumpkin squeezy!)

What you need:
- Needle and thread
- Scissors
- Beads or buttons
- Scrap fabric (NOTE: essentially any fabric works for this. However, I've found that thin fabrics - ex. cotton, linen, etc. is MUCH easier to work with than thick fabrics - ex. corduroys, denim, etc.)
- Optional: hair clips, pins, something to embellish (ex. t-shirt)


Step 1:
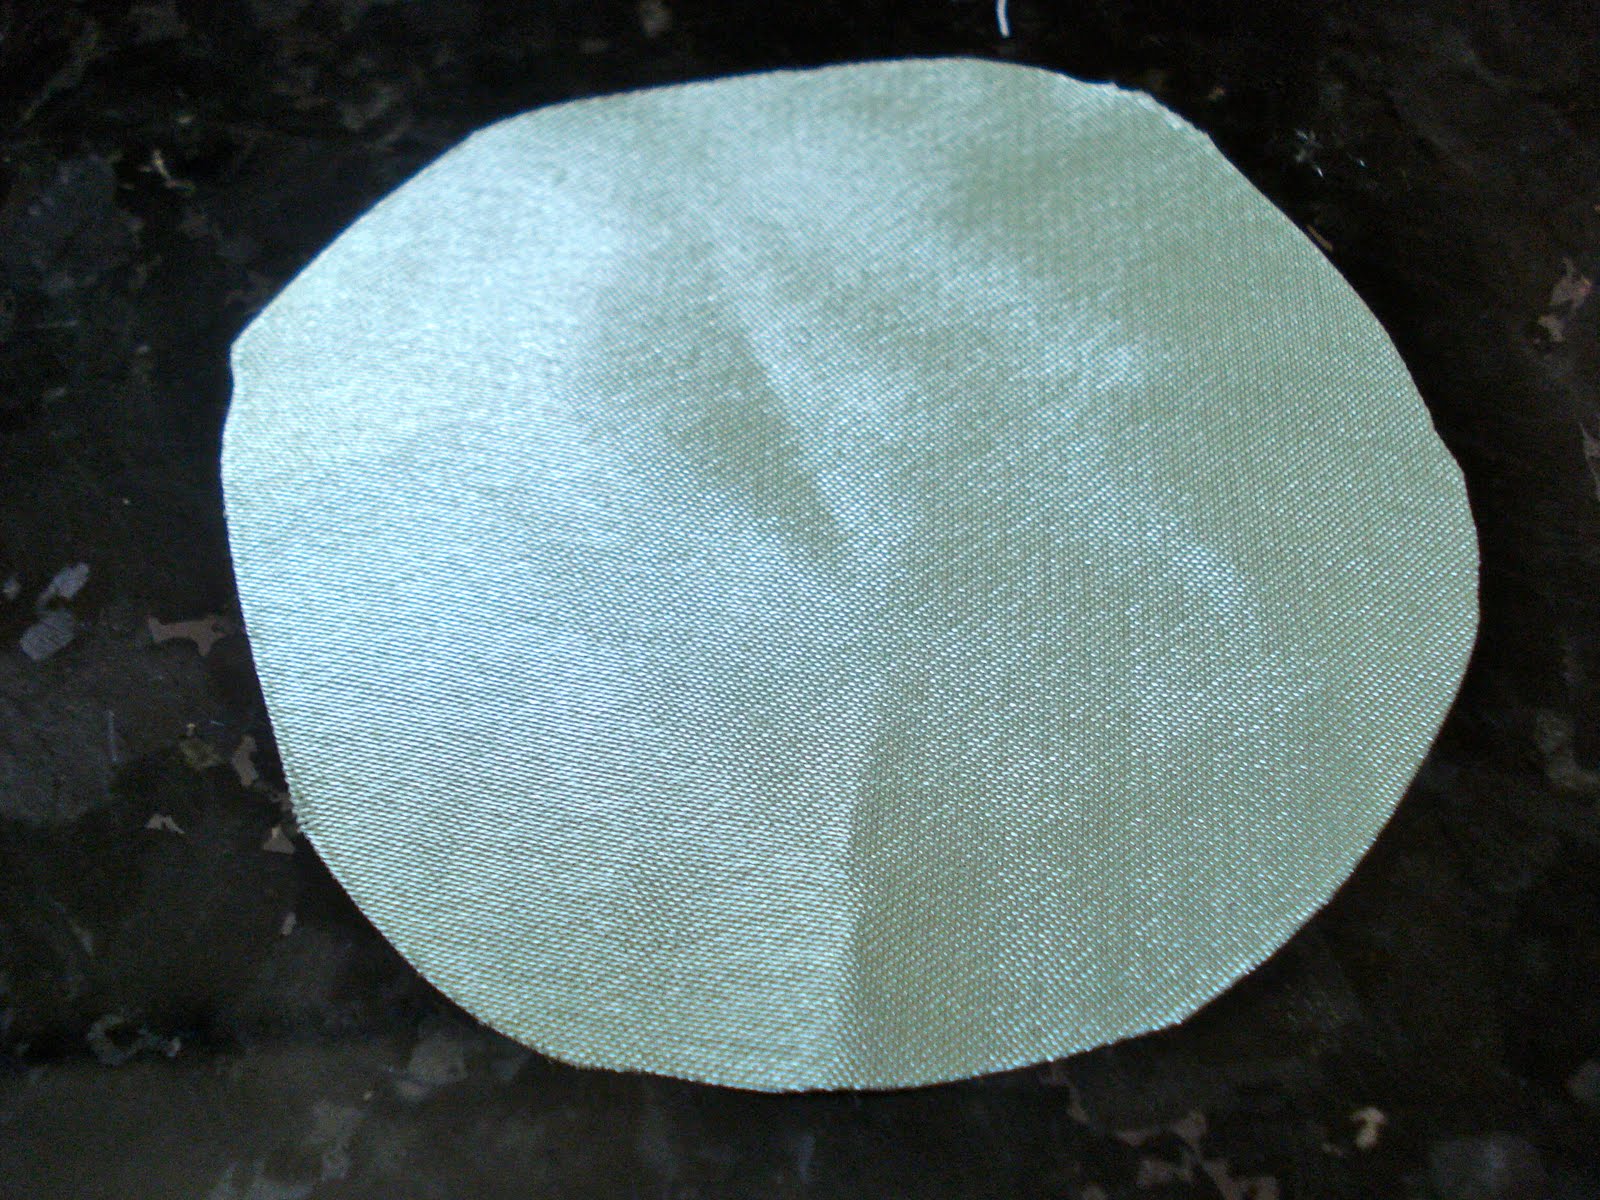
- Cut your scrap fabric into a circle
- The larger the circle, the larger the rosette
- As a rule of thumb (ie not necessarily accurate and I kind of made it up), the radius (MATH TERM - half the size of the diameter/ circle) will be approximately the size of the final rosette


Step 2:
- With a needle and thread, loosely stitch around the circumference (outside) of the circle a few millimeters from its edge
- Make sure the thread is securely knotted at the end


Step 3:
- Gently pull on the needle so that the circle begins to "scrunch" up (kind of like a dumpling! Asian reference.)


Step 4:
- Stitch the centre in place a few times (to prevent fraying and hold it secure)


Step 5:
- Add a form of embellishment to hide the not-so-hot centre
- This can include a single button, a bead, multiple beads, etc.


Step 6:
- Finish it off however you like!
- Step 5 may be the final rosette or you may want to embellish it more, depending on what you'll use it for
- Ex. you may want to add more rosettes and layers (below), sew it onto something as embellishment (ex. t-shirt), or glue gun it to a pin or hairclip (supa cute)
TA-DA!

The beauty of these thingamajigs is that they LOOK complex but it's really like an OPTICAL ILLUSION. They're super simple!

HAVE FUN!
I hope you guys actually try this one because it's REALLY easy. I wouldn't have made over a hundred if it weren't the case. And if you make one... 1) I'd LOVE to see a pictcha and 2) I'd appreciate if you linked back to my blog if you blog about it :). Therefore, make one!

OH, and if there's anyone that gets REALLY into it, PLEASE make this?! It's on my to-do list of things I'll probably never do. But it's BEAUTIFUL. And do-able. And time consuming. And exhausting. But BEAUTIFUL. Hollaaaa!

Chanel Couture 2010, style.com

:)

P.S. Outfit post TOMORROW. I PROMISE. I know it's been awhile and I have now accumulated a small town of photos that will make it onto this blog with time. Amen for good things coming to those that wait. (P.P.S. I don't know if this implies that my outfits are considered "good things" consequently making me sound conceited so to clear the air, I'm not conceited! I just like applying phrases because it makes me sound intellectual and that's always a bonus. iizsmartguyz.)

Kisses.

1.7.10

Dear Canada, I'm sorry I didn't do anything to celebrate your birthday. If it makes you feel better, I didn't do anything for mine... P.S. i luvz u.

So. It's pretty official. Whenever someone views my blog over the next day or two (until I update again) they will see that
1) My sister is the only one on this silly home page (can I get an "oh, haiiii gurl"?)
2) I apparently only make and dress and breathe and eat and sleep and snore and snort (okay, maybe just make and dress) pastels.
Consequently, this may lead you to believe that some android has taken over this blog from a galaxy far, far away. Therefore, to clear any rumors that may be circling around the world wide web HI GUYS IT'S STILL ME. Phew! Just to sort that out. (Pretty media saavy here, dealing with these wild rumors before they get outta hand. Ohhh, to be a public figure.)

*er, AND ONTO THE ACTUAL POST*

Hi guys! Exciting post! I think! If you exclaimation marks, maybe you'll think it's super! duper! awesome! YAY! Anyways! I'll walk you through what I like to describe as "the accumulation of a few hours of summer boredom." Aw yeah, I just quoted myself.

Project #xx
a step-by-step exclusive view

1. INSPIRATION. Okay, I will admit that I kind of wish I had this cool mood board with a variety of exotic and culturally-sounding pieces of reference (ex. "ah, yes, the seafoam green was inspired from the images that I sourced from a Bulgarian magazine from the 1920s, in which..."). However, this hardcore GRANDMA* sweater inspired me, as I wanted to find a way to embellish it. (aka, boring grandma, not cool grandma sweater)

* And by "Grandma Sweater," it REALLY IS a grandma sweater! My Grandma got it as a gift and didn't like it and gave it to me! (...hm, what does that say about my style? Likes grandma sweaters that grandmas don't even like, check)

2. PROCESS. Found a pile of old fabrics that would go well with the sweater. Also decided not to actually sew ONTO the sweater, but make accessories to go with it.


3. FINAL PRODUCT! Took pictures on the whim. Because we have nothing better to do. And I wish I was kidding about that one. But I'm not. Therefore, expect more pictures of other things. Enjoy!

Accessories - Hand sewn by me (Lexy)
Model - Sister (Mimi)
Frosted: a mini collection of accessories
I called it "Frosted" because I thought it personified the underlying intentions of the pieces in that they were, um, OH SCREW THAT. I wanted to name it because it makes me seem like a professional so SHEESH.

a) Hairband
Frosted: Hairband
Hairband

b) Broach
Frosted: Broach
Broach

3) Necklace
Frosted: Bib Necklace
Bib necklace

Yayyyyy!
I had fun making these and hopefully you'll see more of it on the blog! Yo.
(I added the "yo" because I sound slightly pretentious. So it was to detract from the pretentious-ness.(?))

4?. REPEAT. Kind of. I mean, I WANT TO EMBELLISH THIS SKIRT NOW! A fantastic fake silk pink skirt that's a little, well, I've worn it once. But I like it. One of the first pieces I'd evahh thrifted. SHOUT OUTZ TO SWELL VINTAGE/ THRIFT SHOPS IN VANCOUVER! yeeee. But still, I'm in an embellishing (slash needtodostuffinmyfreetime) mood!


Closer look of things on my flickr. Yeah, I made a flickr. I'm pretty much on every social networking website thing out there. (Shameless self promotion: CHECK ME OUT here, here, here, here, et cetera.) If you're super keen, you can have an EARLY LOOK at the layout for the forest nymph shoot here. Will post them on my blog soon... but KEENERS I'm looking at you! Rep-rep-represennnnt.

█ ♥ █ Have a good day! █ ♥ █
(Happy Canada's day my Canadian bloggers! What did you do? I sang Kumbya and lit fireworks. Kidding. I didn't do anything. I did SO little that pretending that I sung Kumbya makes me feel cool. Oh snap.)

P.S. QUESTION: Do you guys want to me to post a tutorial on how to make the rosettes? (flower shape thing in the pieces.)

They're supa easy and supa fun! supa dupa! supa dupa! fo realz. I think I will! I mean, if you want...